How to Change Project Settings
Caution
This feature is for project administrators.
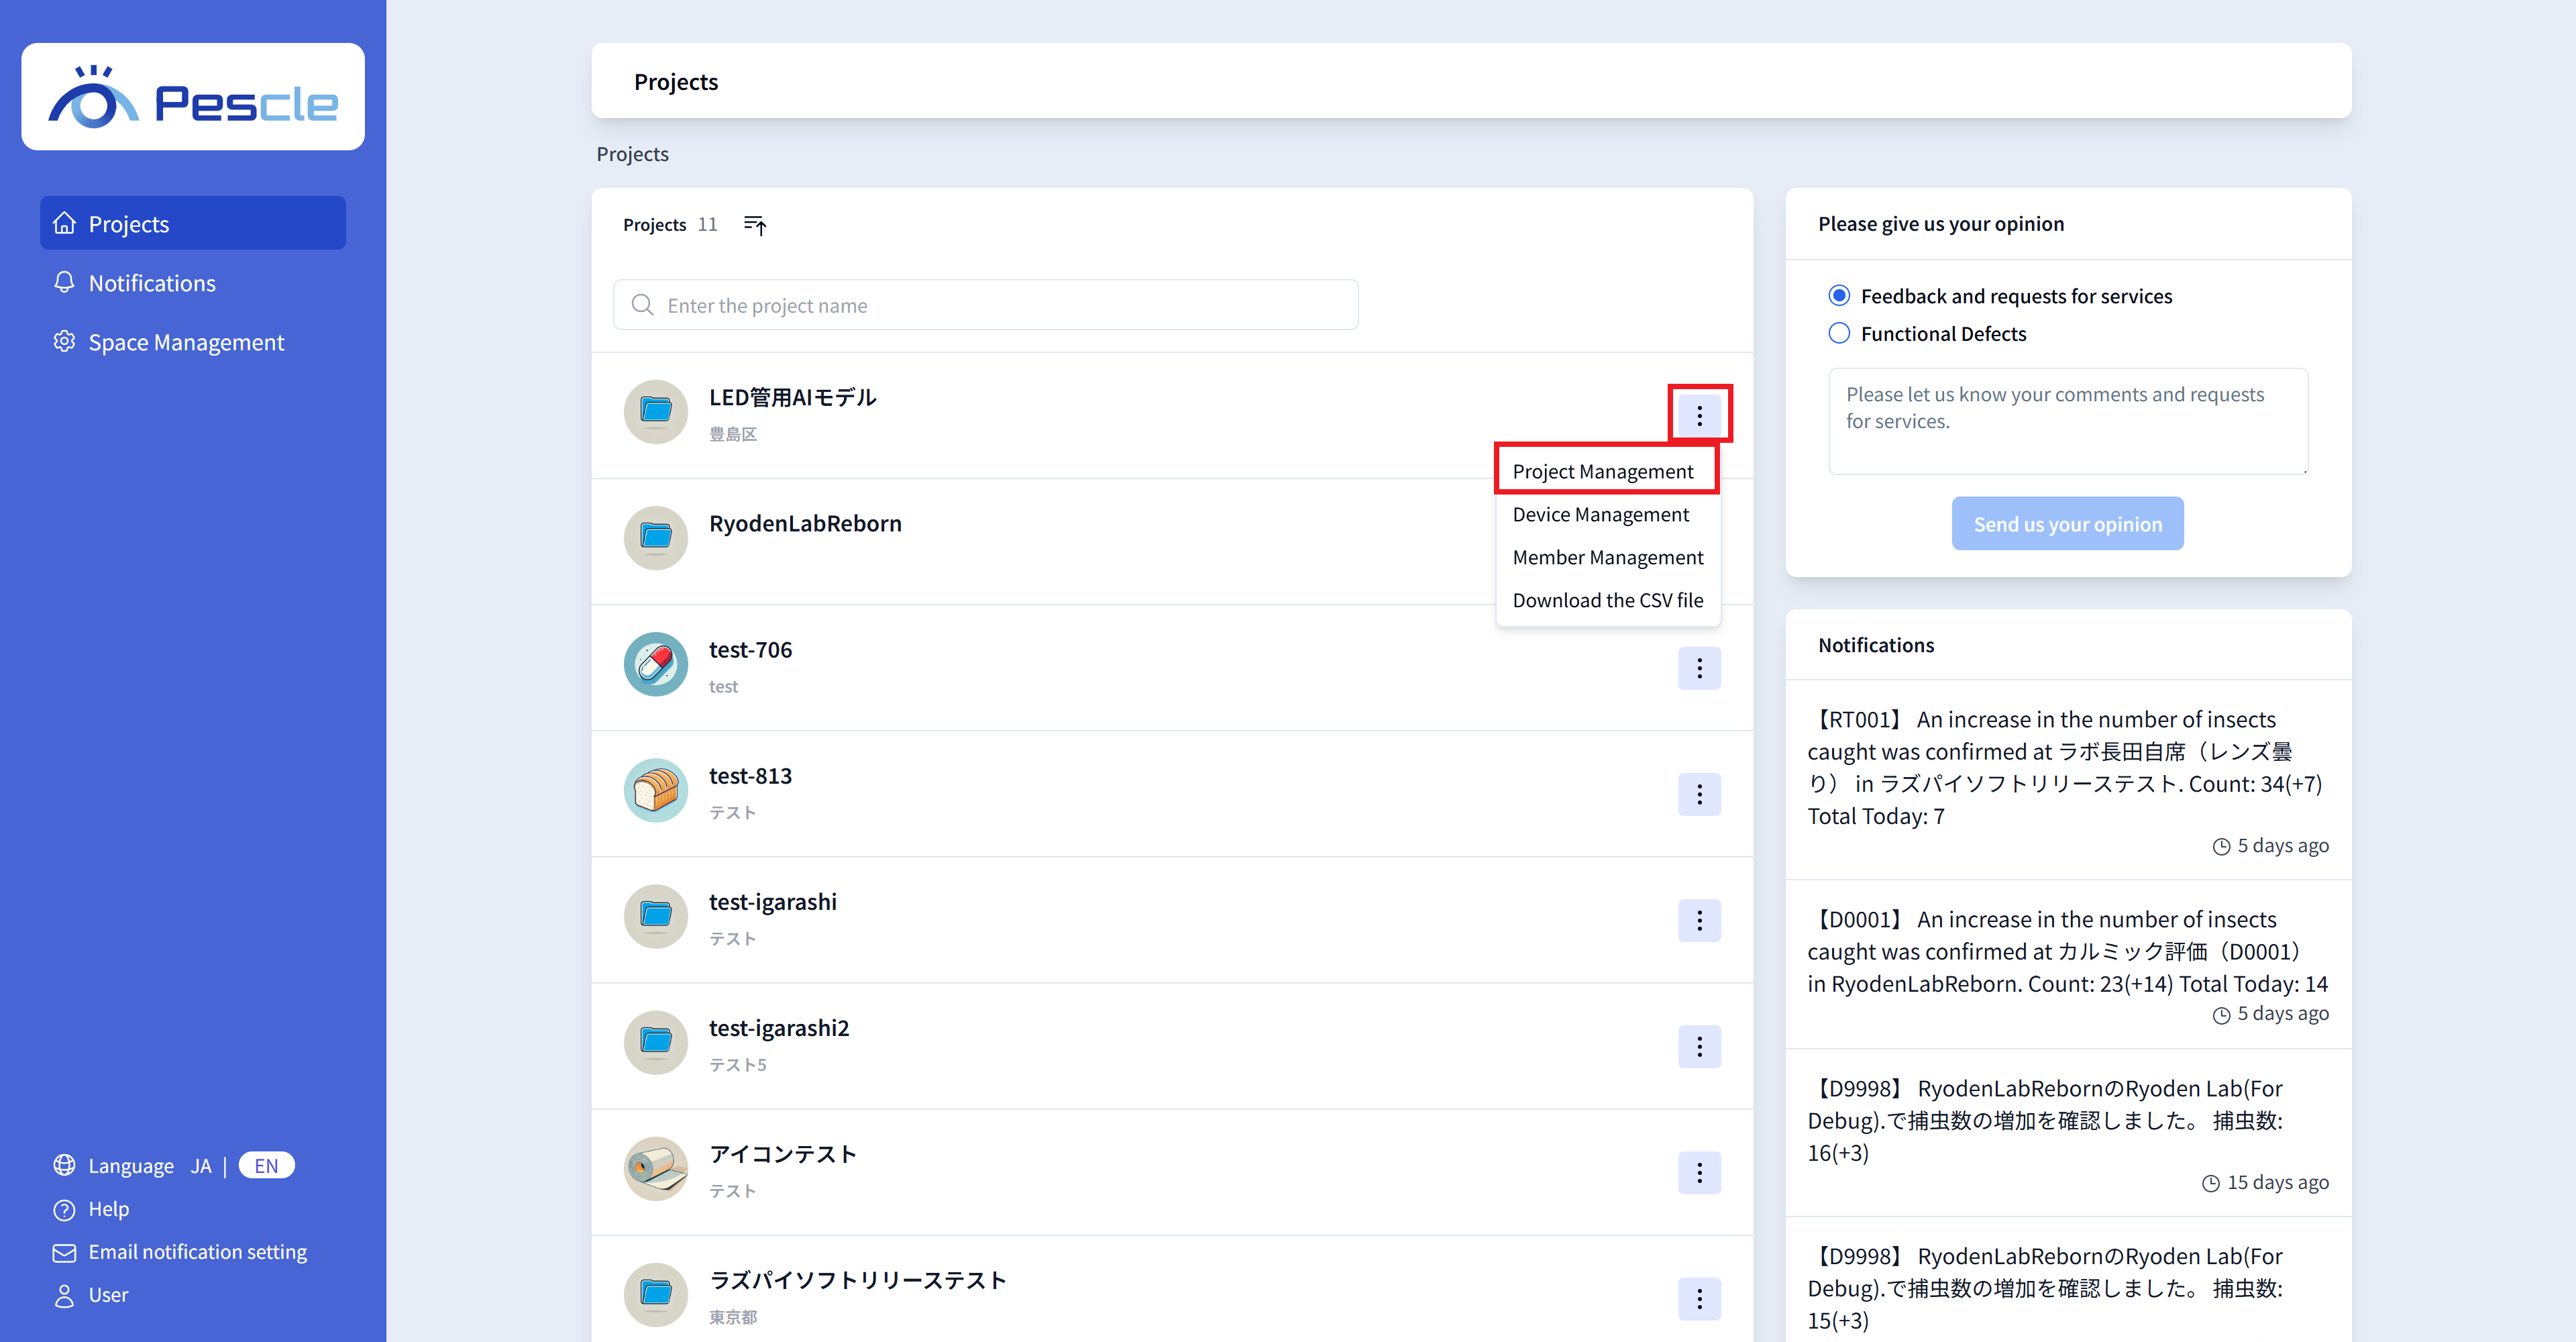
After signing in, the project list will be displayed. Click the vertical ellipsis on the right side of the project you want to change, then click ‘Project Management’.
Hint
You can also navigate from the Project Home screen by clicking the gear icon in the upper right.
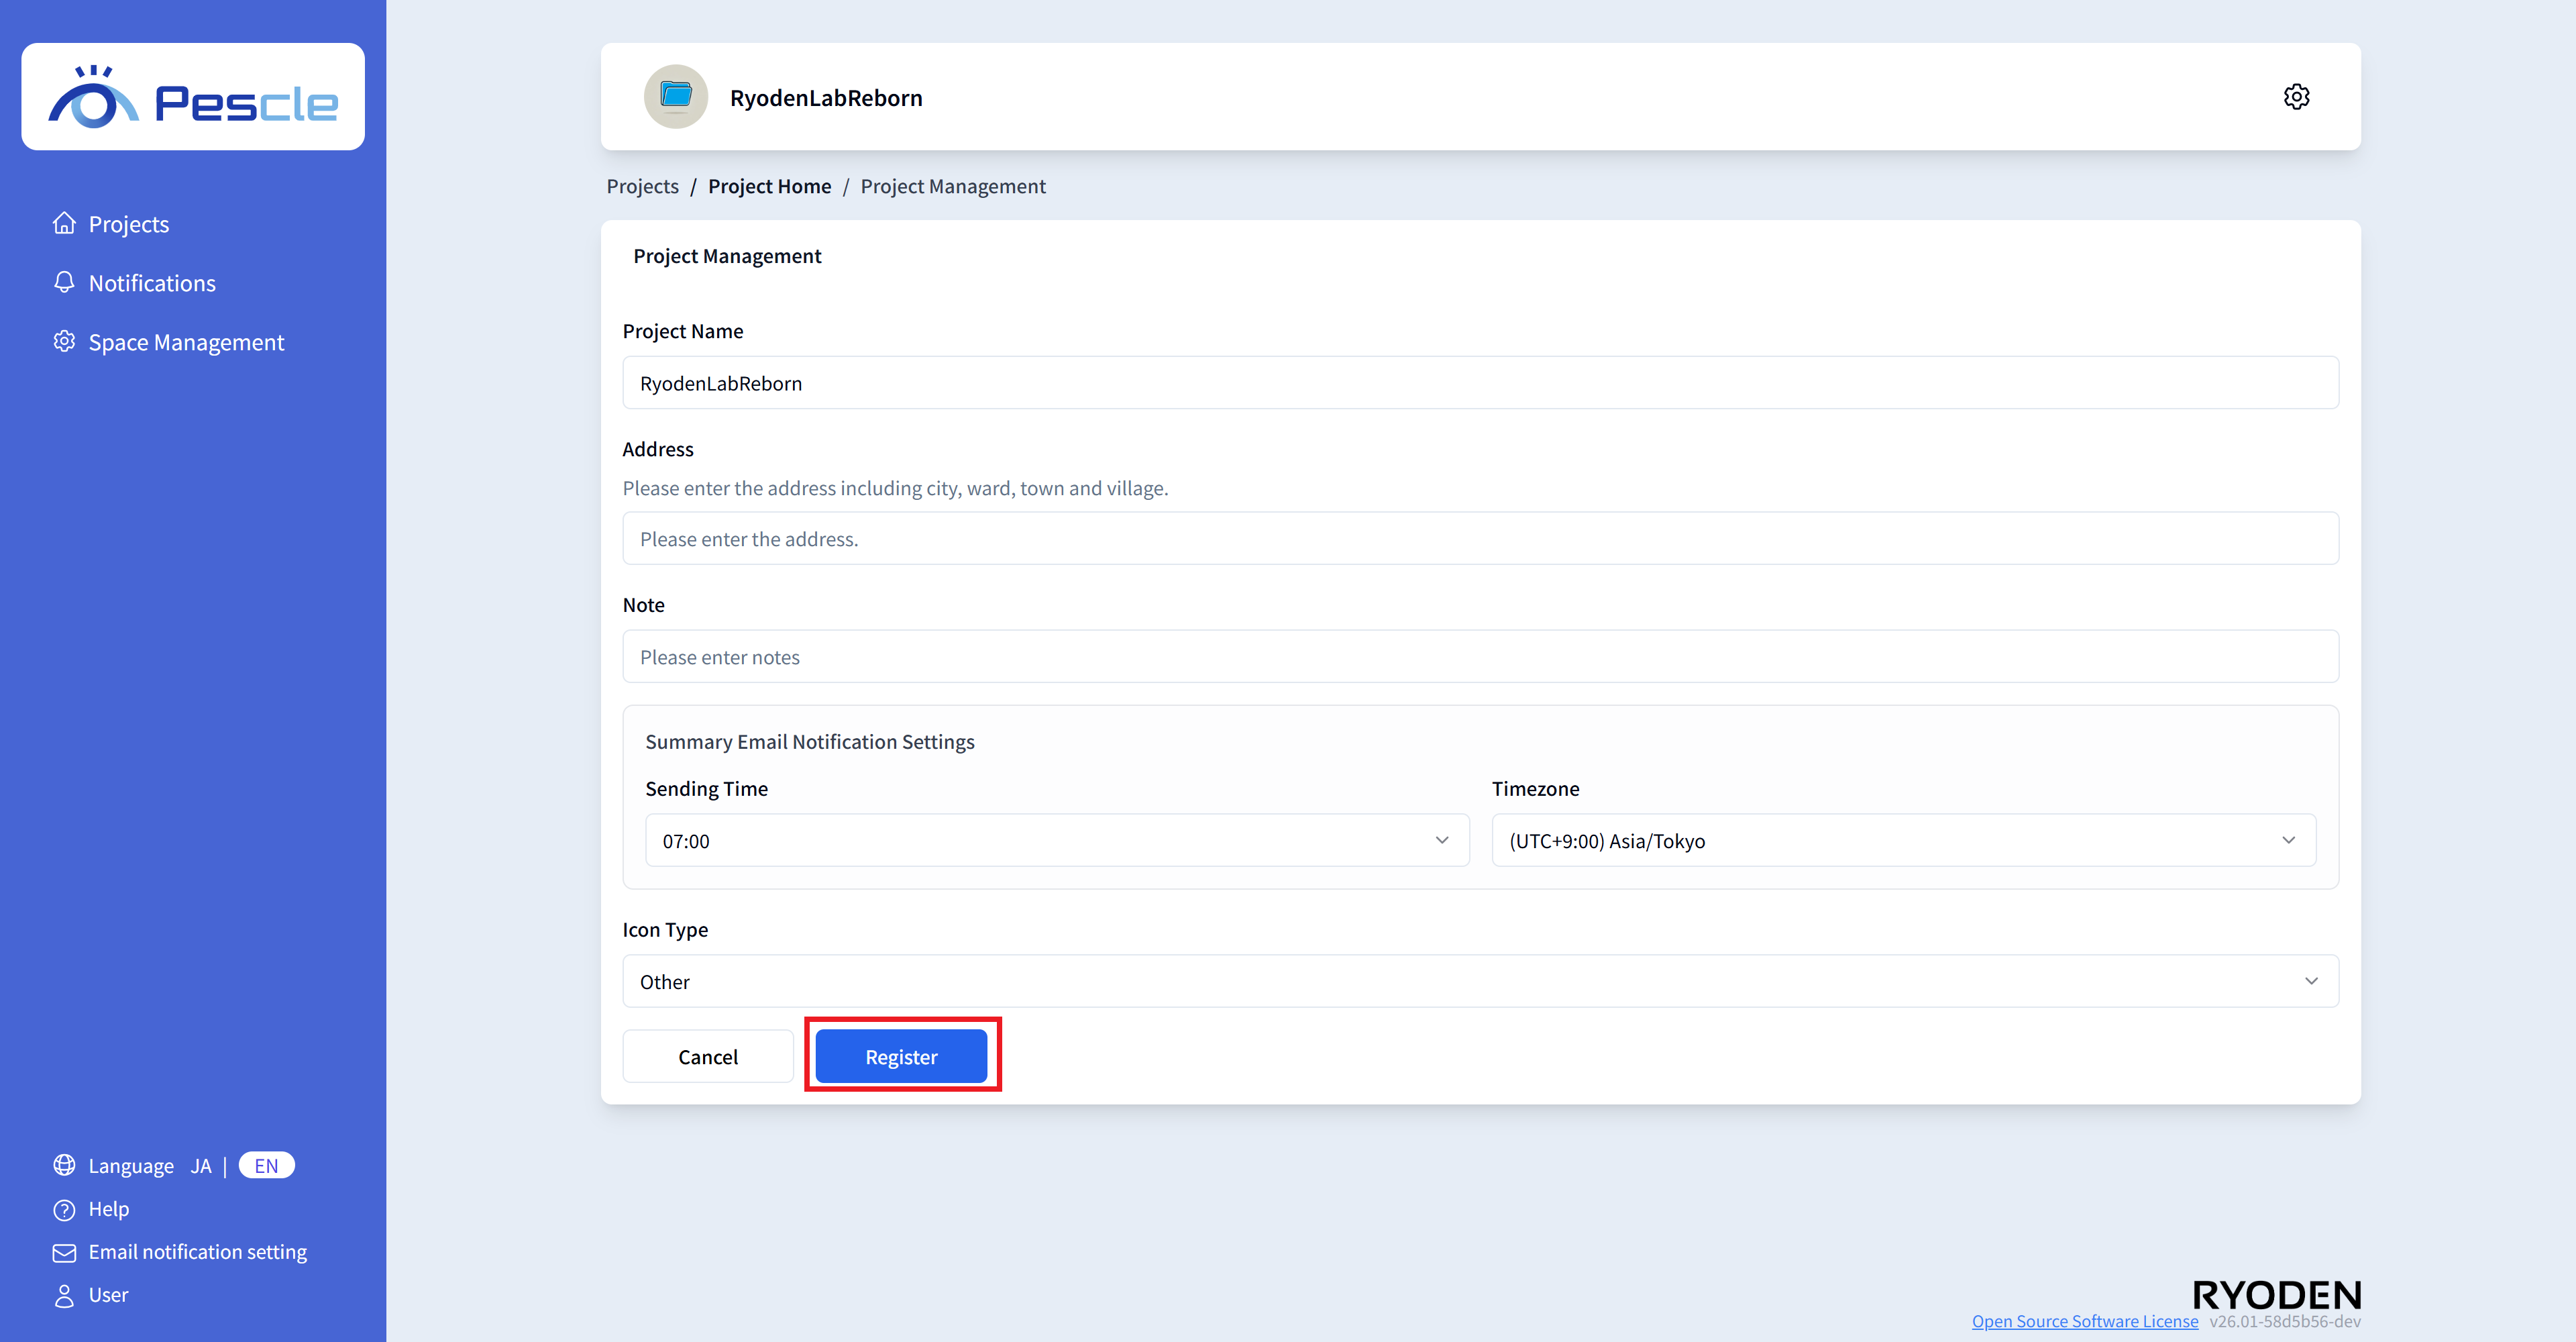
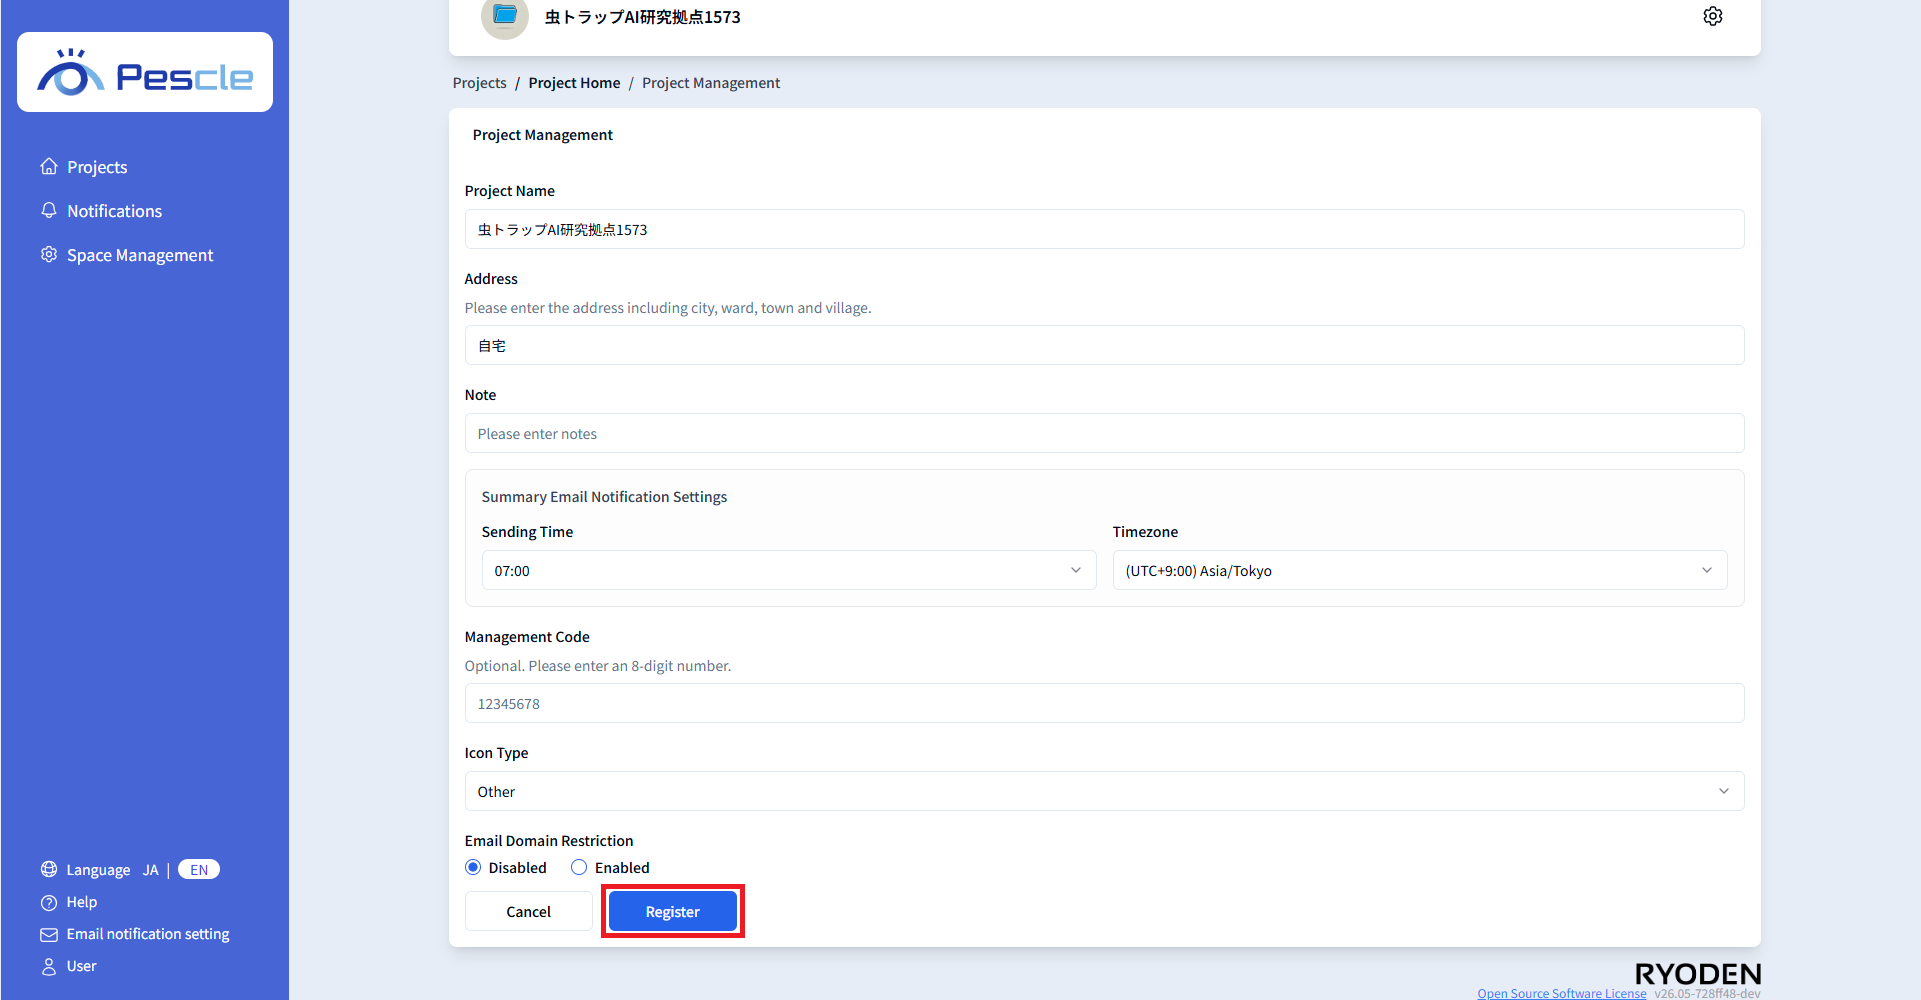
The Project Settings screen will be displayed. Please enter the following.
Project Name
Address
Notes
Summary Email Notification Settings (Sending Time, Time Zone)
Management Code
Icon Type
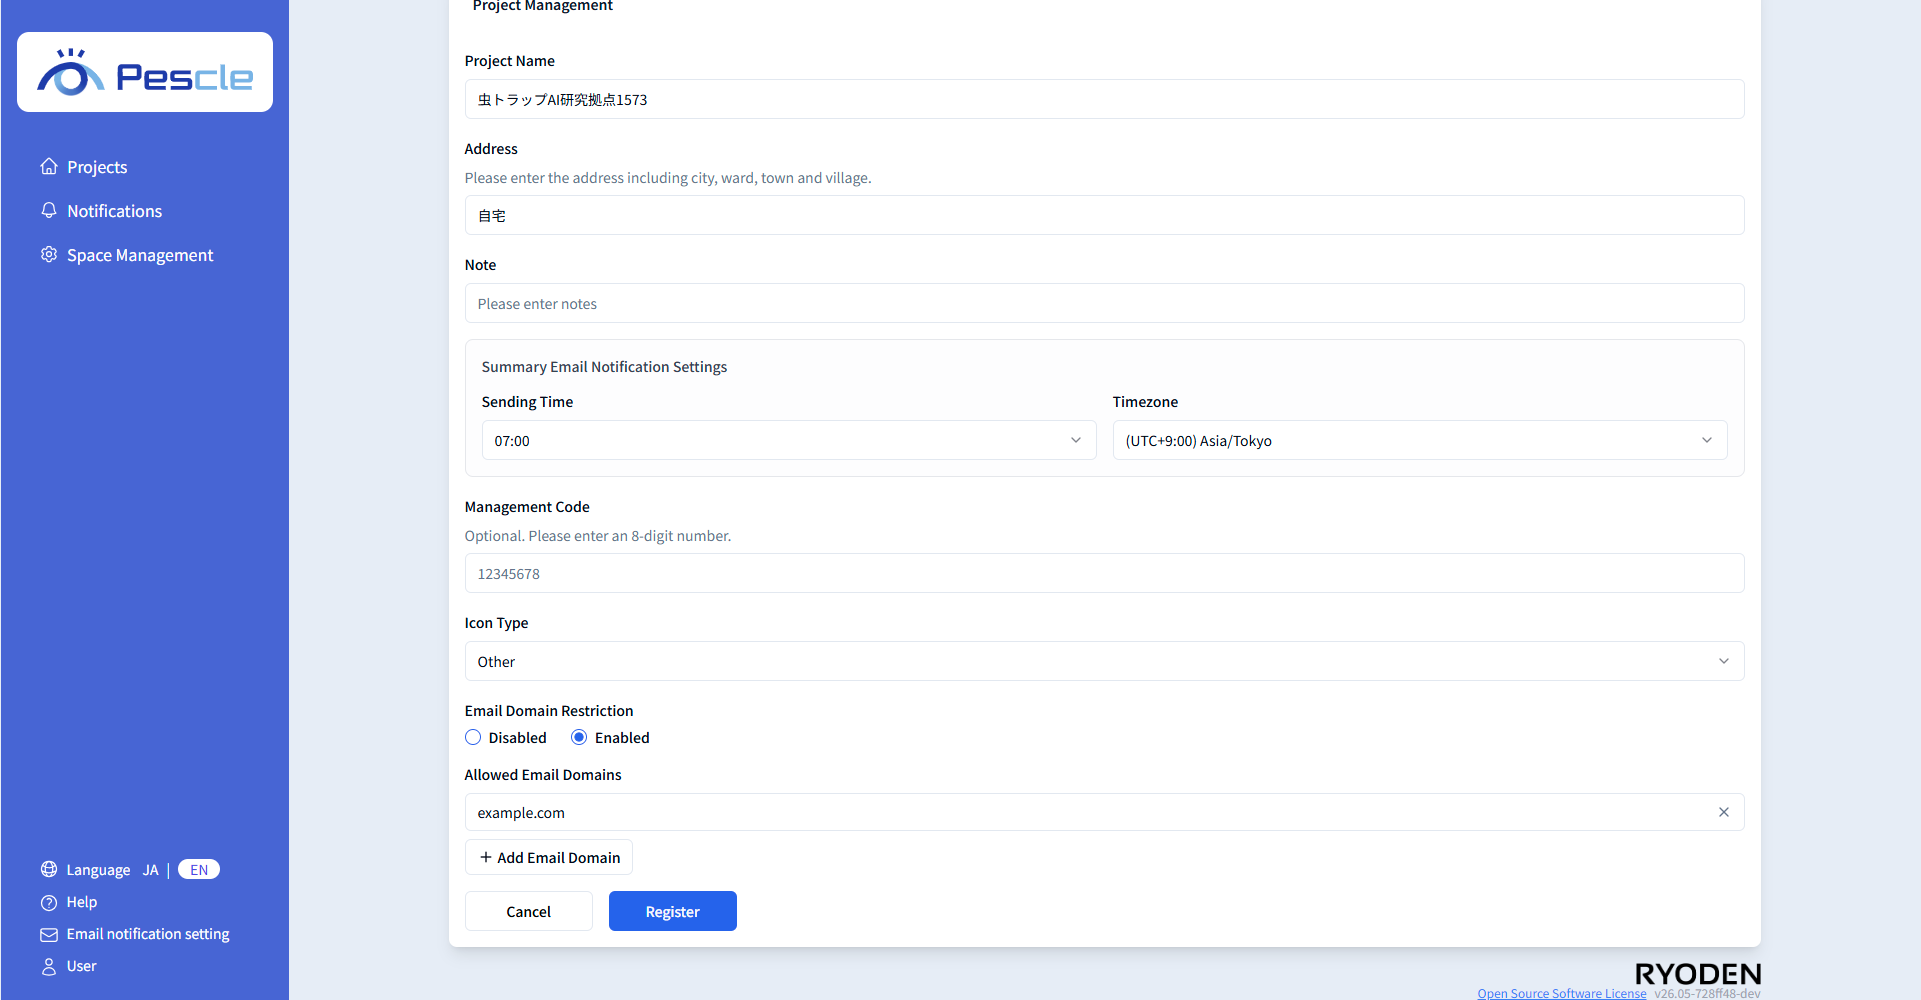
Email Domain Restriction
Allowed Email Domain
When you have finished entering, click the ‘Register’ button.
Management Code
If a management code has been defined for the project, please enter it. This field is optional, so it can be left blank.
Icon Type
Set an icon that matches the industry of the target managed by the project. The set icon is used to identify the project on the screen.
Email Domain Restriction
This feature restricts project member invitations to users with specified email address domains.
There are two types of email domain restriction settings:
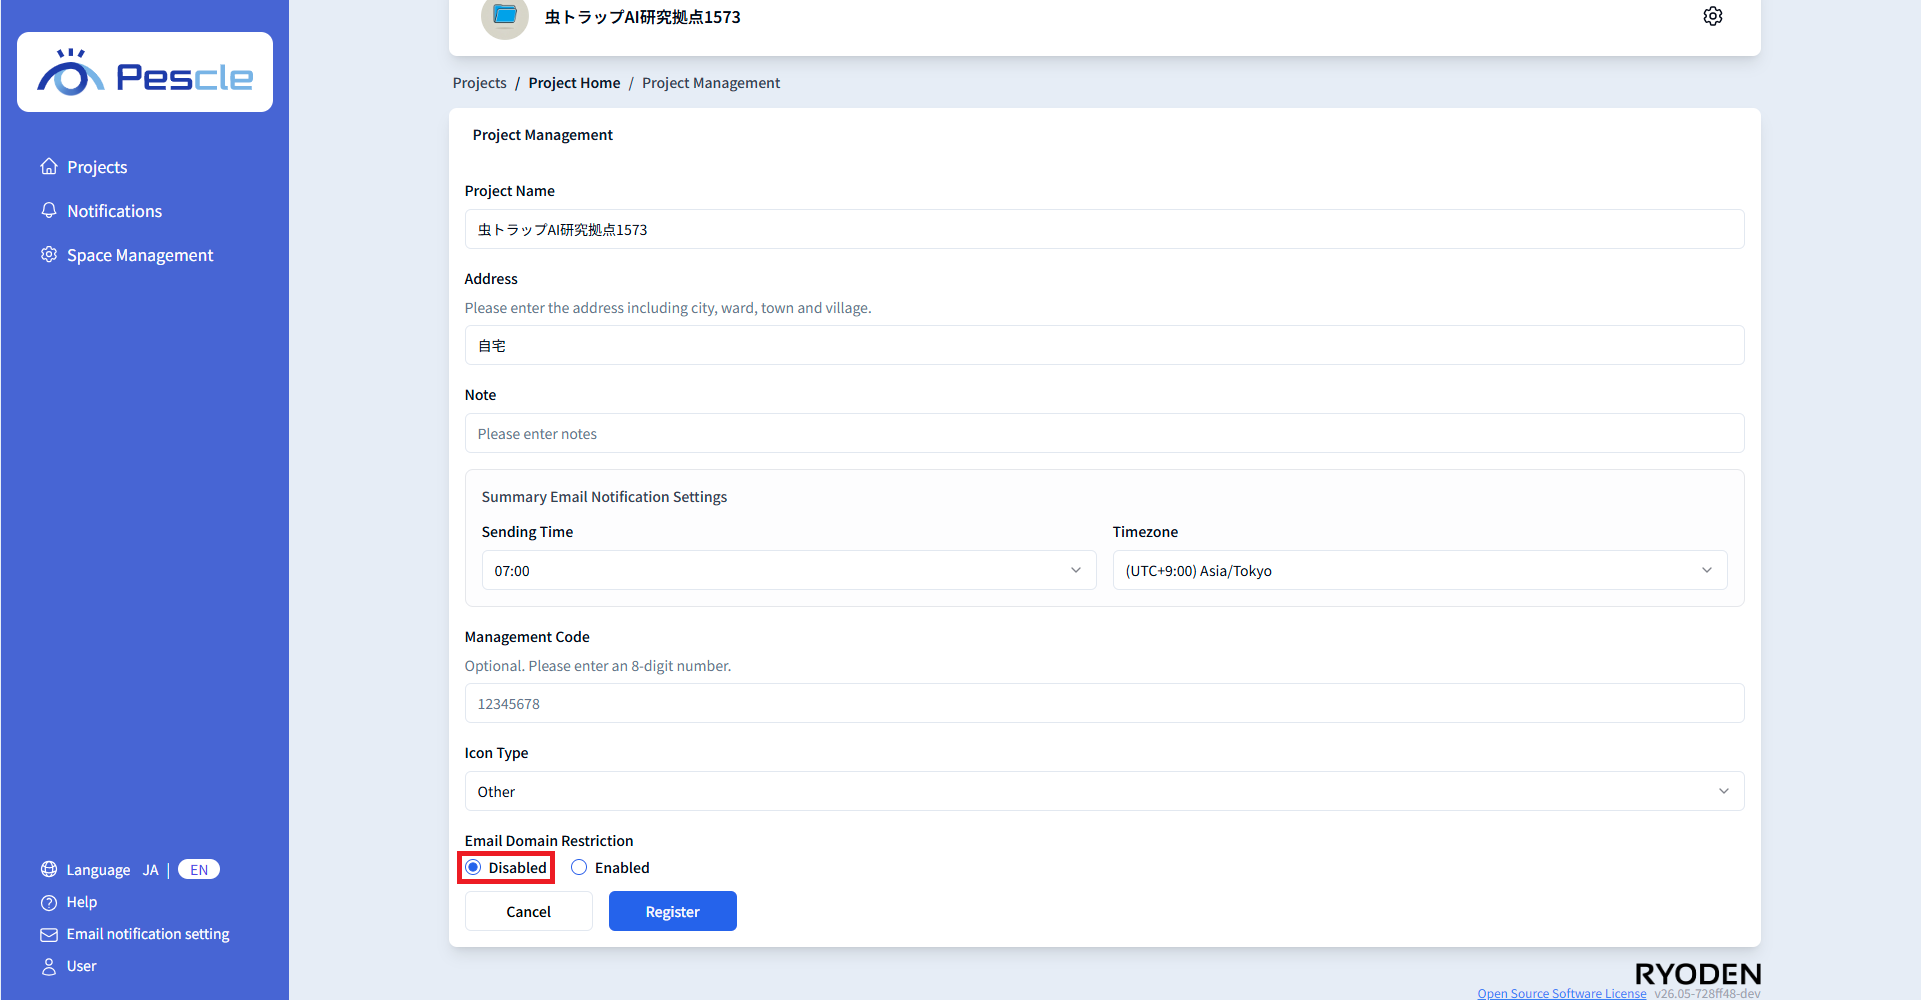
Disable Email Domain Restriction
If no restriction is needed, select ‘Disabled’. When disabled, users with any email address domain can be registered as members.
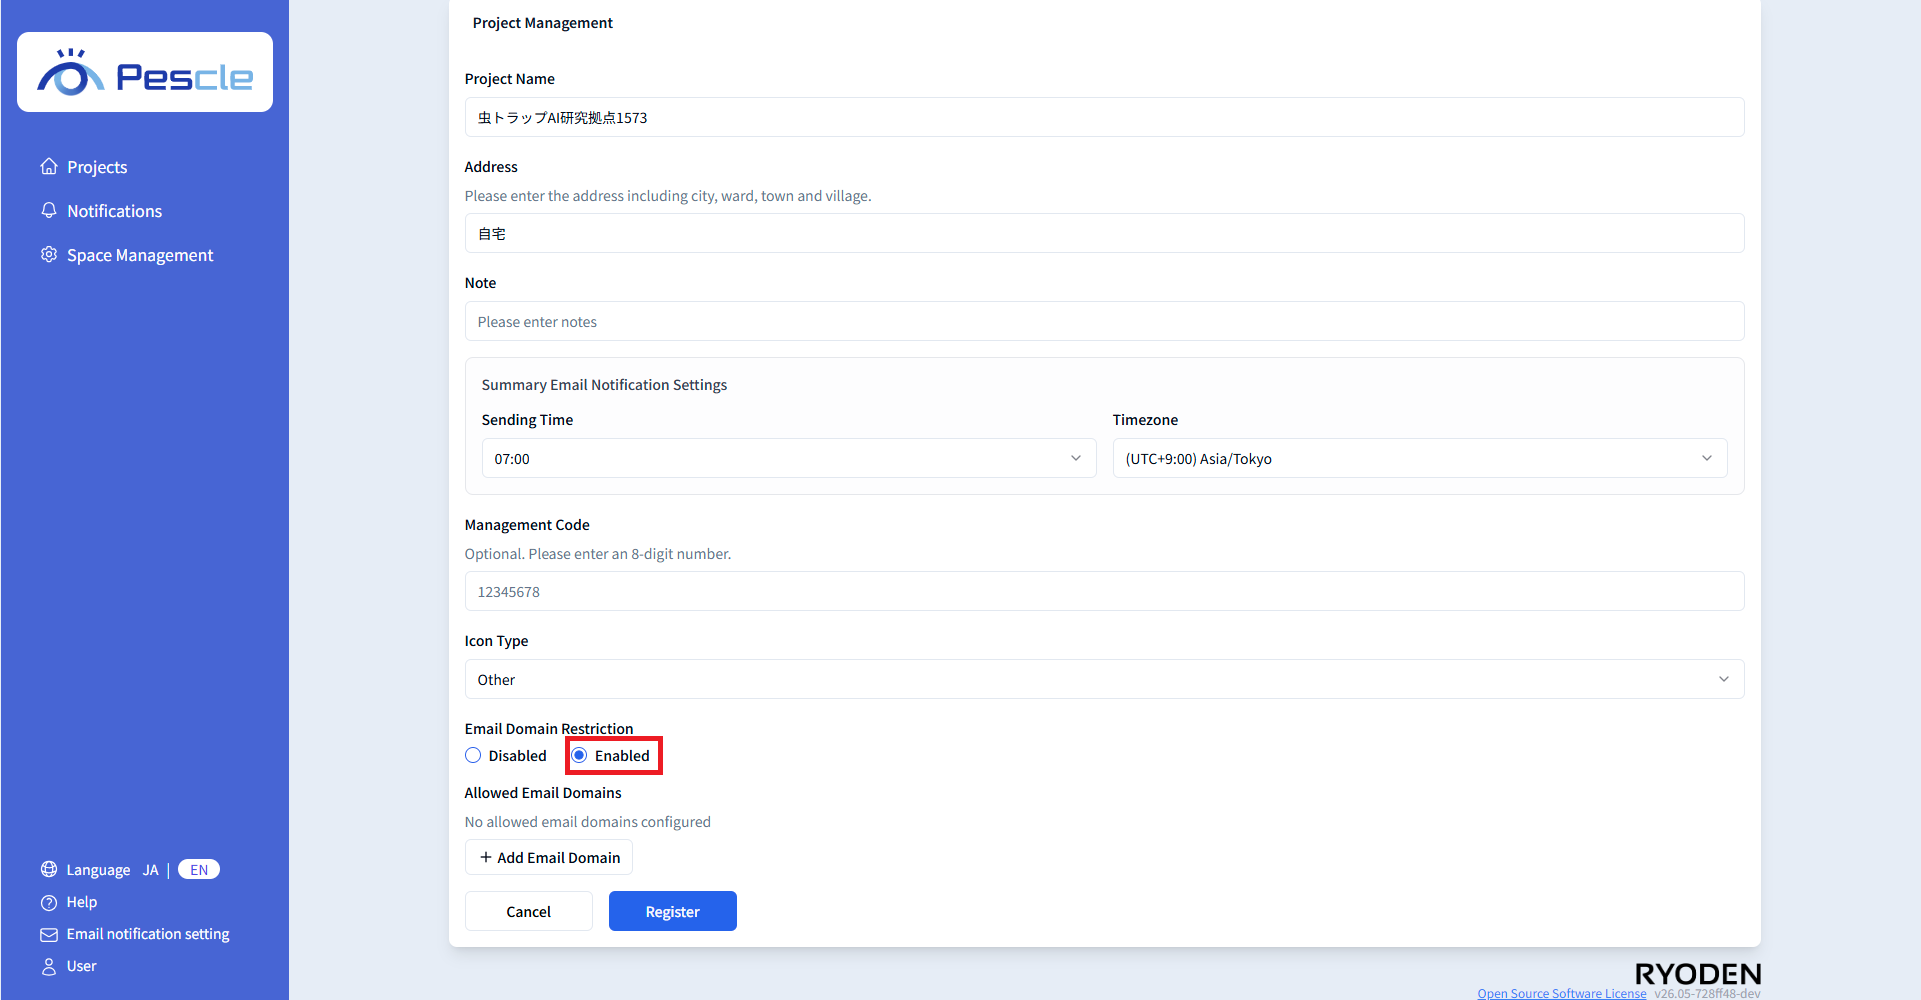
Enable Email Domain Restriction
If you want to allow only specific domains, select ‘Enabled’. When enabled, email addresses with domains not added to the Allowed Email Domain list cannot be registered as members.
Allowed Email Domain
This section is displayed when the email domain restriction is set to ‘Enabled’. Set the domains allowed for member registration. Multiple domains can be registered.
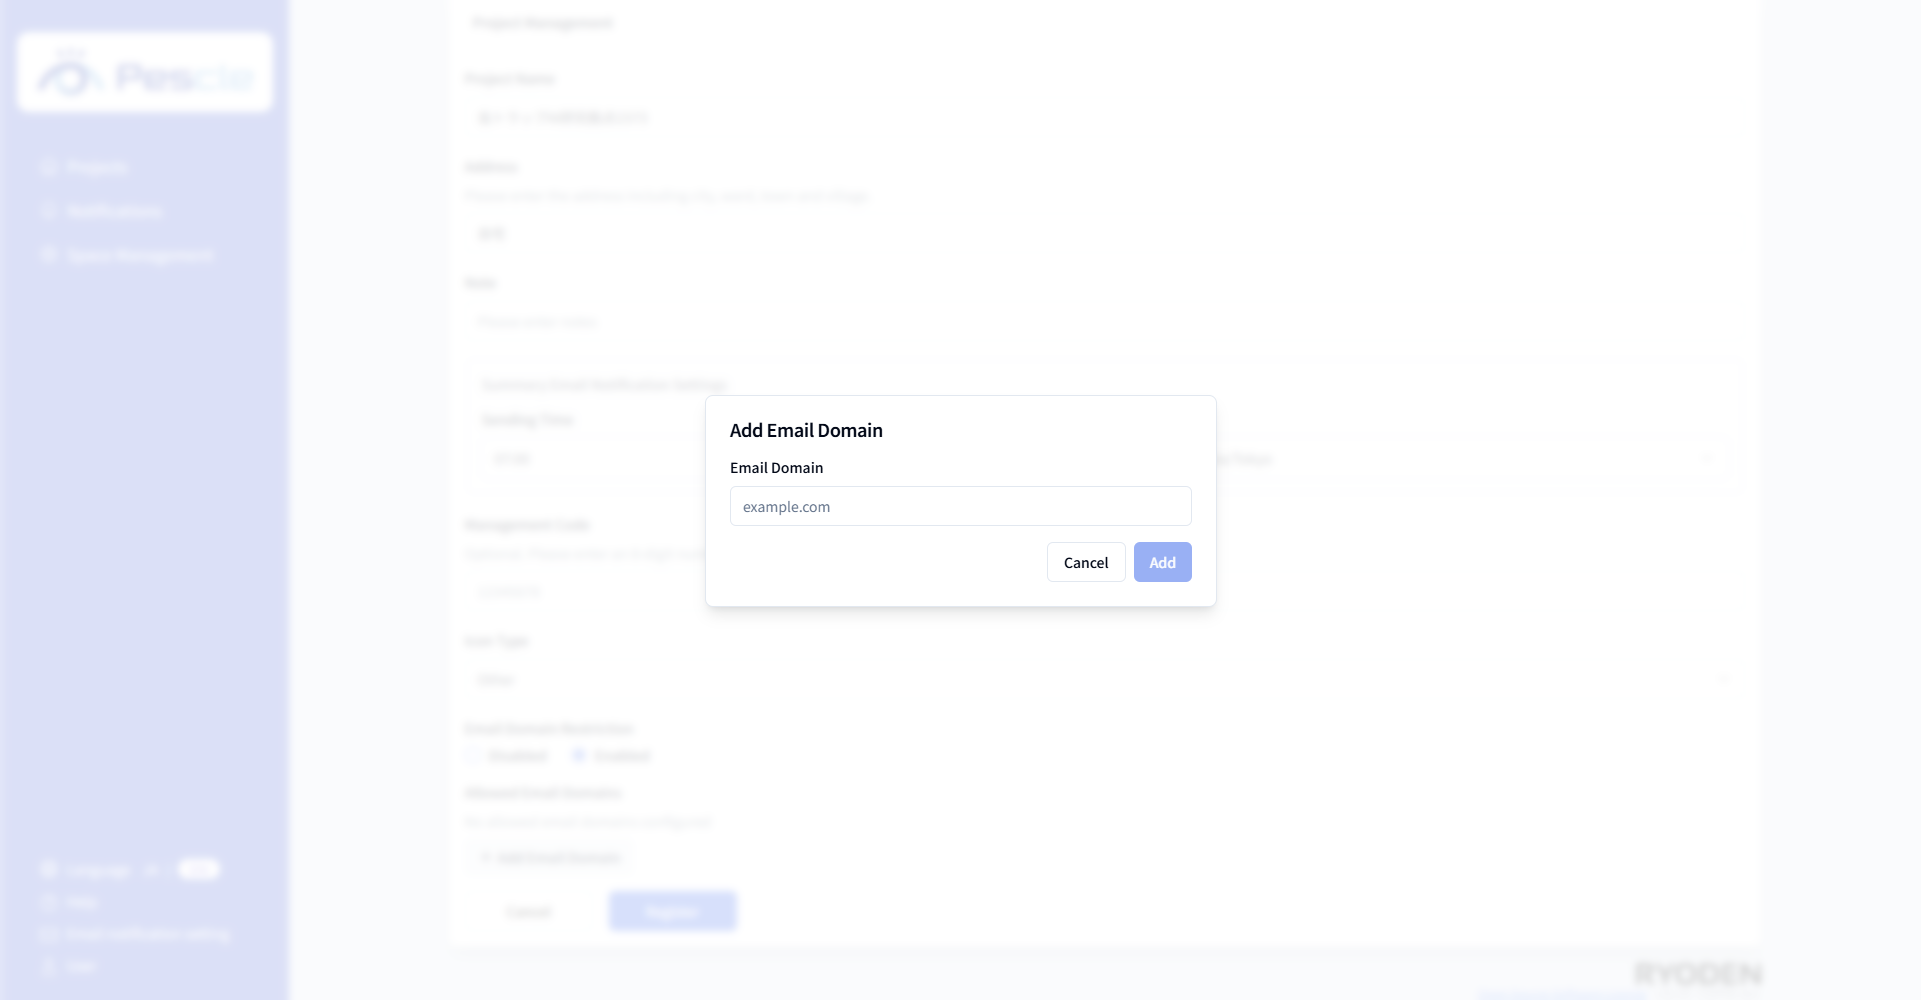
Click the ‘Add Email Domain’ button to enter a domain.
Note
Please enter only the domain name (e.g., example.com). The @ symbol is not required.
Added domains will be displayed in the list. To delete a domain, click the ‘×’ button next to it in the list.